

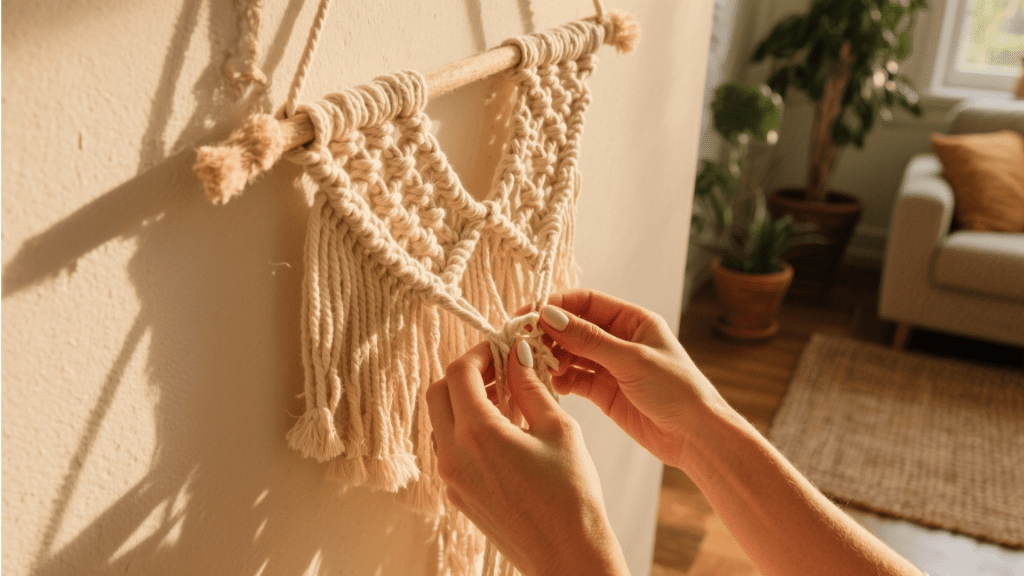
When I started working on my first macrame wall hanging tutorial, I discovered how calming and satisfying the process can be.
The rhythmic knotting motions quieted my busy mind while colorful strands quickly transformed into something beautiful. Clear instructions and helpful videos made the process easy to follow, even as a complete beginner.
By the end, I proudly created my own macrame wall hanging and gained the confidence to keep exploring new designs and patterns.
What’s So Special About Macrame?
Macrame is an ancient craft that creates beautiful designs by knotting cords into patterns.
Today, it has become especially popular for home décor projects, such as wall hangings, because the process is both simple and creative.
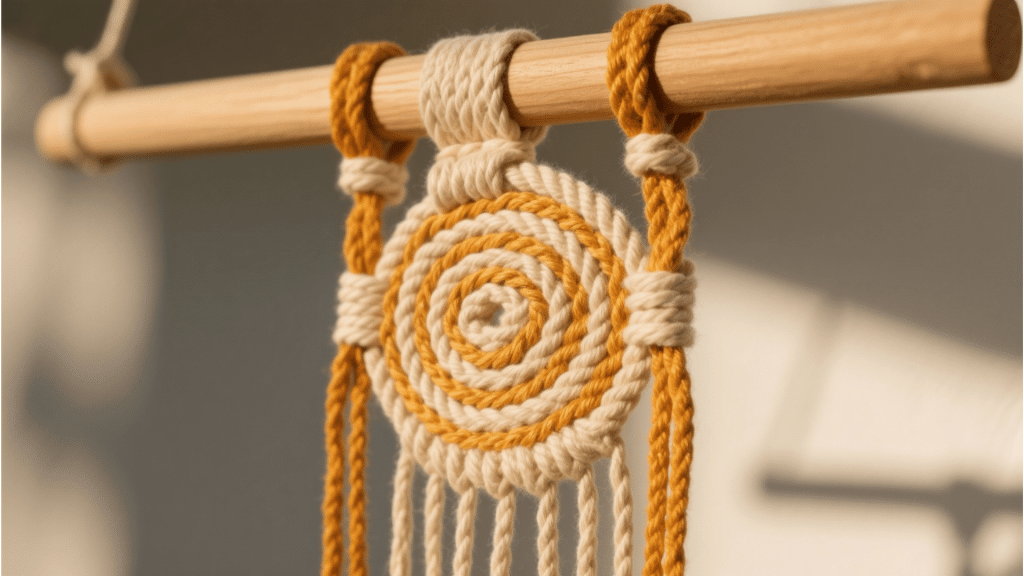
A macrame wall hanging adds warmth, texture, and personality, transforming a plain wall into a stylish focal point. Its natural fibers and handmade charm suit boho, rustic, or minimalist styles, making macrame a versatile choice for any space.
Another special quality is personalization; makers can select colors, sizes, and patterns to match their own style. With a beginner-friendly macrame tutorial, anyone can create a timeless décor piece that feels unique and meaningful.
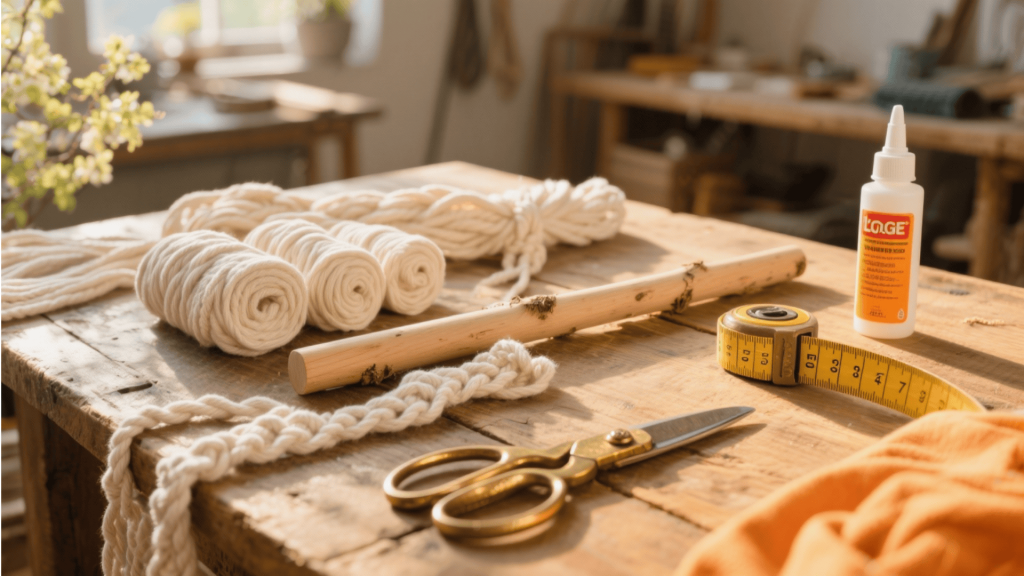
Materials & Tools You’ll Need
| MATERIAL / TOOL | PURPOSE | OPTIONS & TIPS |
| Macrame Cord | Main material for knotting | Cotton (easy), Jute (rustic), Synthetic (durable); 3–5 mm works best. |
| Dowel / Branch / Driftwood / Rod | Base to hang cords | Wood for a classic look, driftwood for a boho style, and metal for a modern style. |
| Measuring Tape | Measure cord lengths | Cut 4–6× project length; extra prevents shortages |
| Scissors | Cutting cords & fringe | Sharp fabric scissors give clean cuts |
| Optional Add-Ons | Decoration & finishing | Beads, rings, dye for style; glue or forceps hide ends. |
Step-by-Step Macrame Wall Hanging Tutorial
Before starting the tutorial, know that it’s simple and beginner-friendly. The steps below outline a clear path to a confident first project.
Step 1: Materials Preparation
The cords are first cut a little longer than necessary, ensuring there is enough length for knots and adjustments later on.
A sturdy base, such as a wooden dowel or a piece of driftwood, is chosen to support the design. Scissors, glue, and a measuring tape are kept close at hand for easy access during the process.
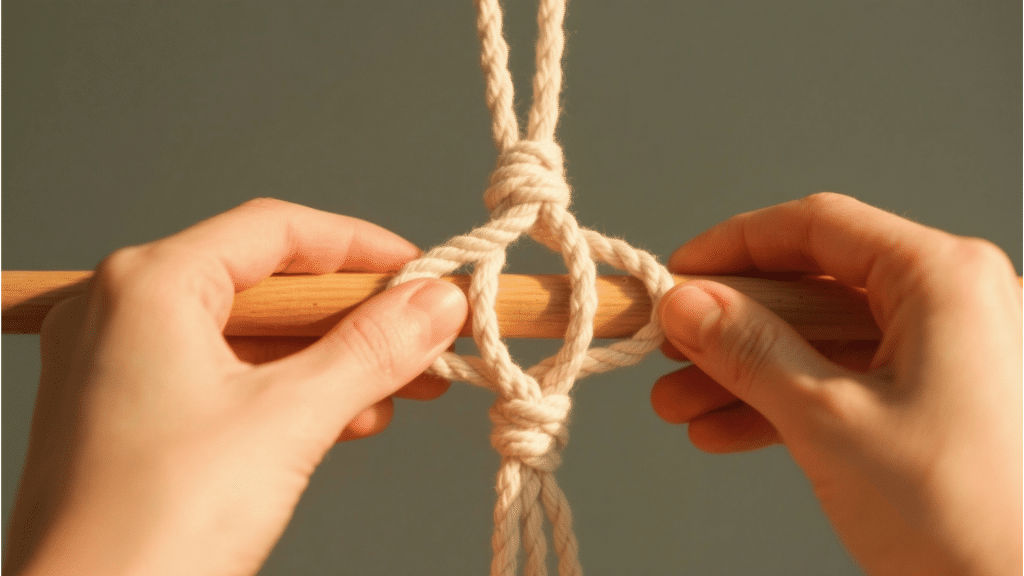
Step 2: Attaching Cords with Lark’s Head Knot
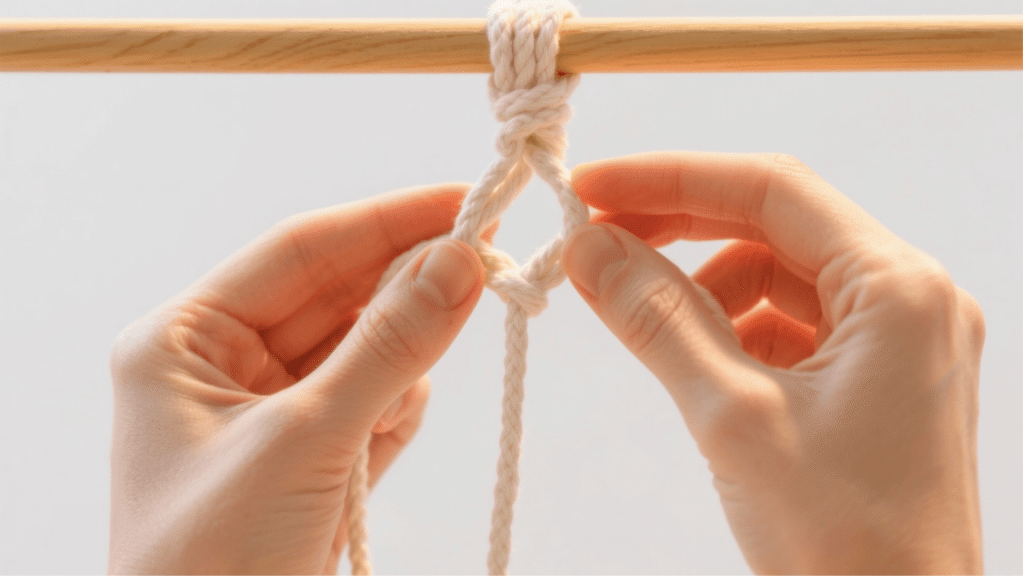
Each cord is folded carefully in half, with the loop placed over the dowel to secure it in position. The two loose ends are pulled through the loop, creating a strong and simple lark’s head knot.
This knotting technique is repeated across the length of the dowel, establishing an evenly spaced and reliable foundation for the macramé design.
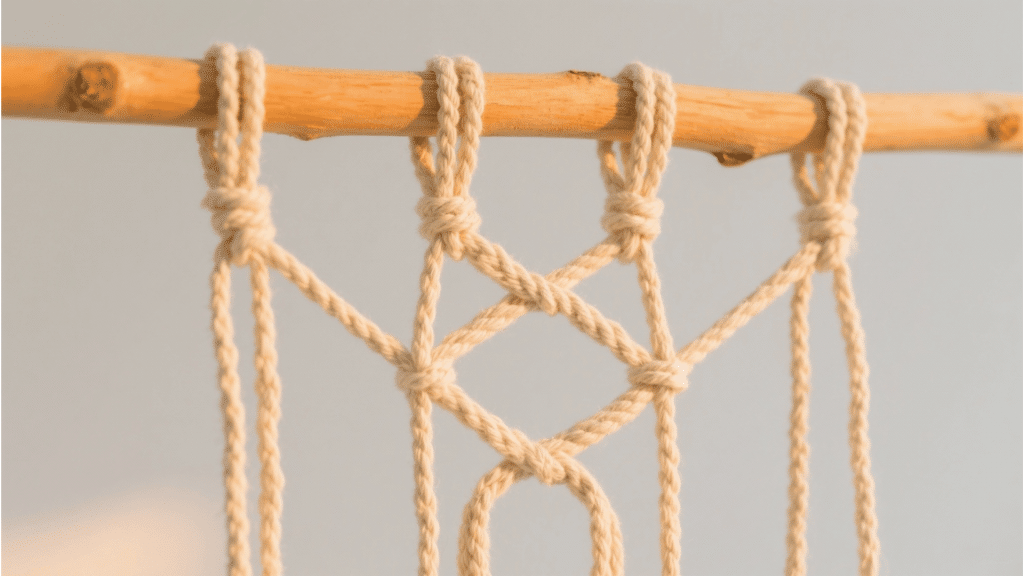
Step 3: Practicing the Square Knot
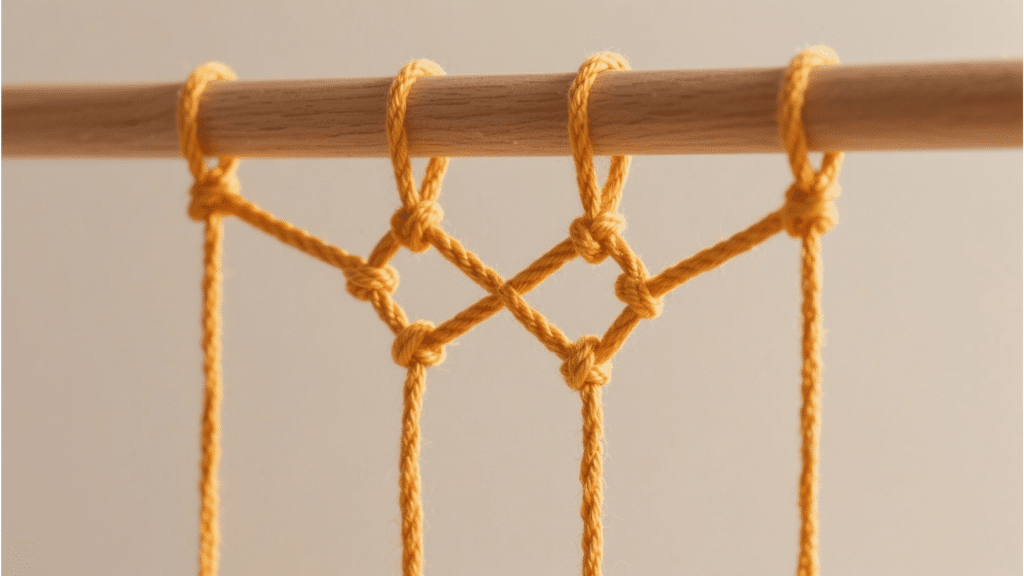
Working with four cords at a time, square knots are created to form the main structure of the wall hanging. The two outer cords are alternately crossed over the two middle cords, which act as anchors.
By maintaining a steady and consistent tension, the knots come together neatly, lending the piece balance and strength.
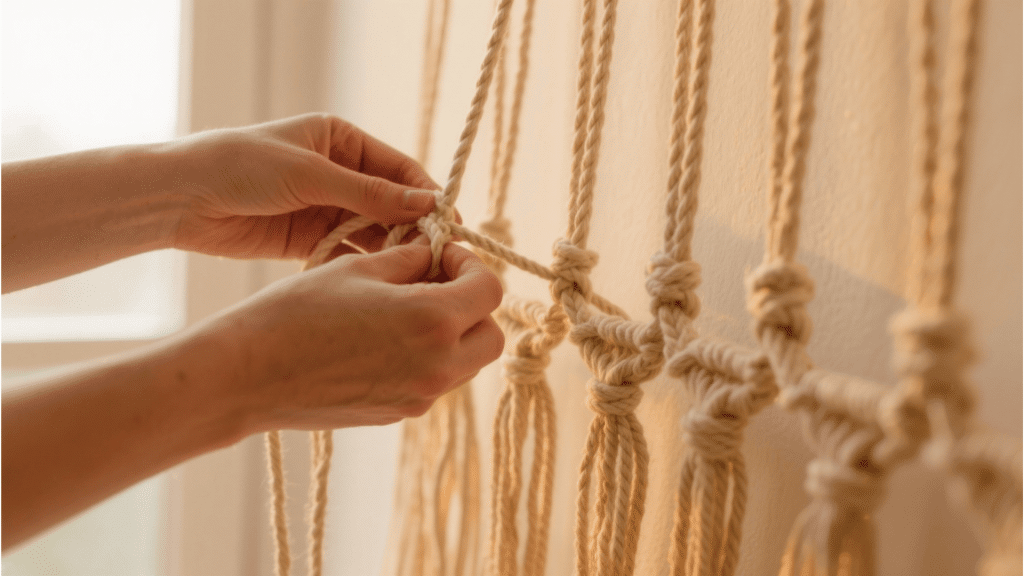
Step 4: Columns and Patterns Creation
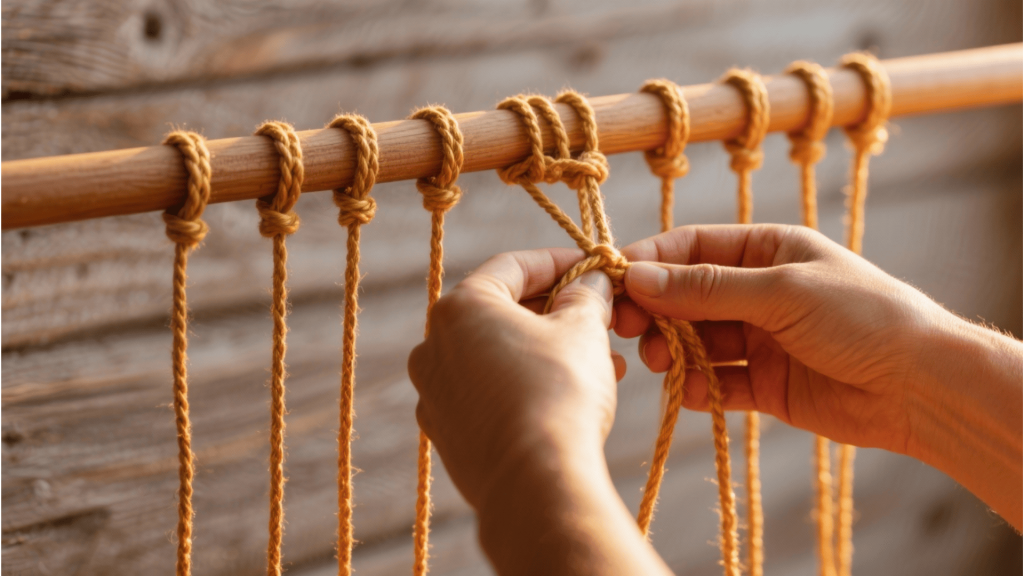
The pattern is gradually built by continuing to tie square knots, either arranged in straight rows for a clean look or staggered to create diamond and ladder-like shapes.
Adjustments in spacing between knots are made to add texture and variety, while the overall symmetry of the design is checked frequently.
This step allows the maker to shape the wall hanging with creativity and style.
Step 5: Finishing and Shaping
Once the desired pattern is complete, all of the bottom cords are gathered together to finish the piece.They are secured firmly with either a wrapping knot or a touch of glue to keep everything in place.
The cords are then trimmed evenly, and the ends are gently unraveled to create a soft fringe, giving the macramé wall hanging a polished and decorative appearance.
Want to see these knots in action? Watch this tutorial for more inspiration.
Basic Knots & Techniques
Learning a few knots is all a beginner needs to start a macrame wall hanging tutorial. These basic ties form the foundation for almost every design, giving each project strength and style.
1. Lark’s Head Knot
The Lark’s Head Knot is the basic starting point for most macramé projects because it securely attaches cords to a base. This base could be a dowel, a tree branch, or even a metal ring, depending on the design.
To make it, the cord is folded in half, the loop is placed over the bar, and the two loose ends are pulled through the loop. It is quick to tie and gives a neat, even starting row.
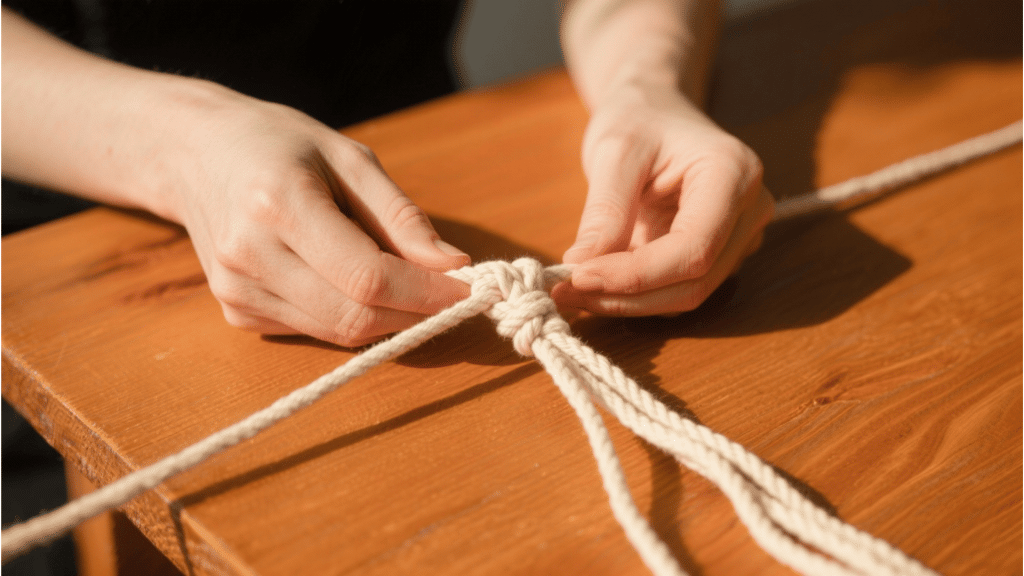
2. Square Knot
The Square Knot is one of the most common and versatile knots in macramé. It uses four cords, where the two outer cords work around the two center filler cords.
By alternating the sides as you tie, the knot creates a balanced, woven texture that is both strong and decorative. This knot is especially popular in wall hangings and plant hangers because it holds its shape well.
3. Half Hitch
The Half Hitch is a simple knot that adds detail to designs and is often used to create diagonal lines.
In this knot, one working cord wraps once around another cord that acts as the holder. When repeated in a row, it creates slanted lines that bring structure and direction to the pattern.
It’s very easy to learn and a useful knot for geometric styles.
4. Double Half Hitch

The Double Half Hitch is made by tying two Half Hitches in a row with the same cord. Doing this creates a tighter, straighter line that looks cleaner and more defined than a single Half Hitch.
This knot is excellent for outlining shapes or creating structured borders within a design. It gives macramé pieces a neat and professional finish.
5. Spiral Knot (Half Square Knot)
The Spiral Knot is formed by repeating only one half of the Square Knot over and over. Instead of switching sides, the same side is tied each time, which naturally makes the cords twist into a spiral.
This creates a rope-like effect that adds flow and movement to wall hangings. It’s great for adding variety and texture to larger designs.
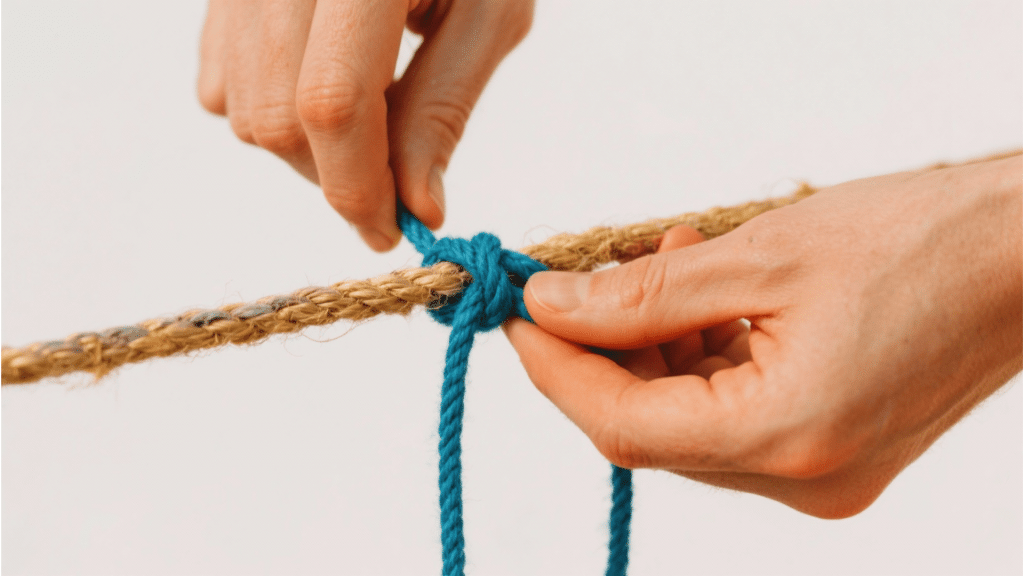
6. Overhand Knot
The Overhand Knot is the simplest and most basic knot in macramé, and also one of the easiest to learn. It is made by forming a loop and then pulling the cord end through the loop.
This knot can secure loose cords at the bottom of a project or be used as a decorative accent. It is also useful when adding beads, as it helps hold them in place.
7. Gathering Knot (Wrapping Knot)
The Gathering Knot is used to bring several cords together neatly, usually at the bottom of a macramé project. A short cord is wrapped tightly around the group of hanging cords, with its ends tucked inside to stay hidden.
This knot finishes plant hangers and wall hangings with a polished look, combining function and decoration to keep the project tidy and aesthetically pleasing. These seven macrame knots enable beginners to create endless, confident wall hangings.
Tips & Troubleshooting
Even simple projects can present small challenges, but a few smart tips make it much easier to follow through. Here are quick tips to follow.
- Cut cords longer than needed: It’s easier to trim extra cord than to run short halfway through.
- Keep knots even: Avoid pulling too tight or leaving them loose; steady tension creates a neat look.
- Fix uneven lengths: Trim carefully or adjust knots upward before finishing.
- Gently untwist cords: Use a comb or your fingers to smooth out the twisted strands.
- Stay organized: Mark patterns and keep your workspace tidy.
With these simple tricks, a touch of creativity, and a bit of care, anyone can craft a neat, stylish, and truly unique handmade piece.
Conclusion
Creating my own wall hanging turned out to be such a relaxing and rewarding experience.
With just a few simple supplies and easy knots, such as the lark’s head and square knot, I was able to follow a macrame wall hanging tutorial and bring my design to life.
I love how the natural texture and handmade look of macrome adds warmth and character, whether I’m going for a boho, rustic, or even modern style.
By practicing knots and keeping cords even, I kept the piece neat and balanced. With patience and creativity, I finished a project I’m proud to hang in my home.